1. 从数据仓库获取数据#
¥ Getting data from the data warehouse
在本工作流程的这一部分,你将学习如何使用 HTTP 请求 节点发出 HTTP 请求来获取数据。
¥In this part of the workflow, you will learn how to get data by making HTTP requests with the HTTP Request node.
完成此部分后,你的工作流将如下所示:
¥After completing this section, your workflow will look like this:
Workflow preview placeholder.
首先,为构建 Nathan 的工作流做好准备。
¥First, let's set the scene for building Nathan's workflow.
创建新工作流#
¥Create new workflow
打开你的编辑器 UI,并使用以下两个命令之一创建一个新的工作流:
¥Open your Editor UI and create a new workflow with one of the two possible commands:
- 在键盘上按 ++Ctrl+Alt+N++ 或 ++Cmd+Option+N++。
¥Select Ctrl+Alt+N or Cmd+Option+N on your keyboard.
- 打开左侧菜单,导航至“工作流”,然后选择“添加工作流”。
¥Open the left menu, navigate to Workflows, and select Add workflow.
将此新工作流命名为 "Nathan 的工作流程。"
¥Name this new workflow "Nathan's workflow."
你需要做的第一件事是从 ABCorp 的旧数据仓库获取数据。
¥The first thing you need to do is get data from ABCorp's old data warehouse.
在前面的章节中,你使用了一个专为特定服务(Hacker News)设计的操作节点。但并非所有应用或服务都拥有专用节点,例如 Nathan 公司使用的传统数据仓库。
¥In a previous chapter, you used an action node designed for a specific service (Hacker News). But not all apps or services have dedicated nodes, like the legacy data warehouse from Nathan's company.
虽然我们无法直接导出数据,但 Nathan 告诉我们数据仓库提供了一些 API 端点。这就是使用 n8n 中的 HTTP 请求 节点访问数据所需的全部信息。
¥Though we can't directly export the data, Nathan told us that the data warehouse has a couple of API endpoints. That's all we need to access the data using the HTTP Request node in n8n.
No node for that service?
HTTP 请求节点是最通用的节点之一,允许你发出 HTTP 请求以查询应用和服务中的数据。你可以使用它来访问 n8n 中没有专用节点的应用或服务中的数据。
¥The HTTP Request node is one of the most versatile nodes, allowing you to make HTTP requests to query data from apps and services. You can use it to access data from apps or services that don't have a dedicated node in n8n.
添加 HTTP 请求节点#
¥Add an HTTP Request node
现在,在编辑器界面中,添加一个 HTTP 请求节点,就像你在第 添加节点 课中学到的那样。节点窗口将打开,你需要在其中配置一些参数。
¥Now, in your Editor UI, add an HTTP Request node like you learned in the lesson Adding nodes. The node window will open, where you need to configure some parameters.

此节点将使用凭据。
¥This node will use credentials.
Credentials
凭据 是用于识别用户或服务并允许其访问应用或服务的唯一信息(在本例中,表示为 n8n 个节点)。常见的凭据形式是用户名和密码,但根据服务的不同,凭据也可以采用其他形式。
¥Credentials are unique pieces of information that identify a user or a service and allow them to access apps or services (in our case, represented as n8n nodes). A common form of credentials is a username and a password, but they can take other forms depending on the service.
在这种情况下,你需要 ABCorp 数据仓库 API 的凭据,这些凭据包含在你注册此课程时收到的 n8n 电子邮件中。如果你尚未注册,请执行 在此注册。
¥In this case, you'll need the credentials for the ABCorp data warehouse API included in the email from n8n you received when you signed up for this course. If you haven't signed up yet, sign up here.
在“HTTP 请求”节点的“参数”中,进行以下调整:
¥In the Parameters of the HTTP Request node, make the following adjustments:
- 方法:默认值应为 GET。确保将其设置为 GET。
¥Method: This should default to GET. Make sure it's set to GET.
- URL:添加你注册此课程时在电子邮件中收到的数据集 URL。
¥URL: Add the Dataset URL you received in the email when you signed up for this course.
- 发送标头:将此控件切换为“真”。在“指定标头”中,确保已选中“使用以下字段”。
¥Send Headers: Toggle this control to true. In Specify Headers, ensure Using Fields Below is selected.
-
标头参数 > 名称:输入
unique_id。¥Header Parameters > Name: Enter
unique_id. -
标头参数 > 值:你注册本课程时在电子邮件中收到的唯一 ID。
¥Header Parameters > Value: The Unique ID you received in the email when you signed up for this course.
-
身份验证:选择“通用凭据类型”。此选项需要凭据才能允许你访问数据。
¥Authentication: Select Generic Credential Type. This option requires credentials before allowing you to access the data.
-
通用身份验证类型:选择“标头身份验证”。(选择身份验证的通用凭据类型后,此字段才会显示。)
¥Generic Auth Type: Select Header Auth. (This field will appear after you select the Generic Credential Type for the Authentication.)
-
标头身份验证凭据:要添加你的凭据,请选择“+ 创建新凭据”。此操作将打开“凭据”窗口。
¥Credential for Header Auth: To add your credentials, select + Create new credential. This will open the Credentials window.
-
在“凭据”窗口中,将“名称”设置为你注册此课程时在电子邮件中收到的标头身份验证名称。
¥In the Credentials window, set Name to be the Header Auth name you received in the email when you signed up for this course.
-
在“凭据”窗口中,将“值”设置为你注册此课程时在电子邮件中收到的标头身份验证值。
¥In the Credentials window, set Value to be the Header Auth value you received in the email when you signed up for this course.
-
在“凭据”窗口中选择“保存”按钮以保存你的凭据。你的凭据连接窗口应如下所示:
¥Select the Save button in the Credentials window to save your credentials. Your Credentials Connection window should look like this:
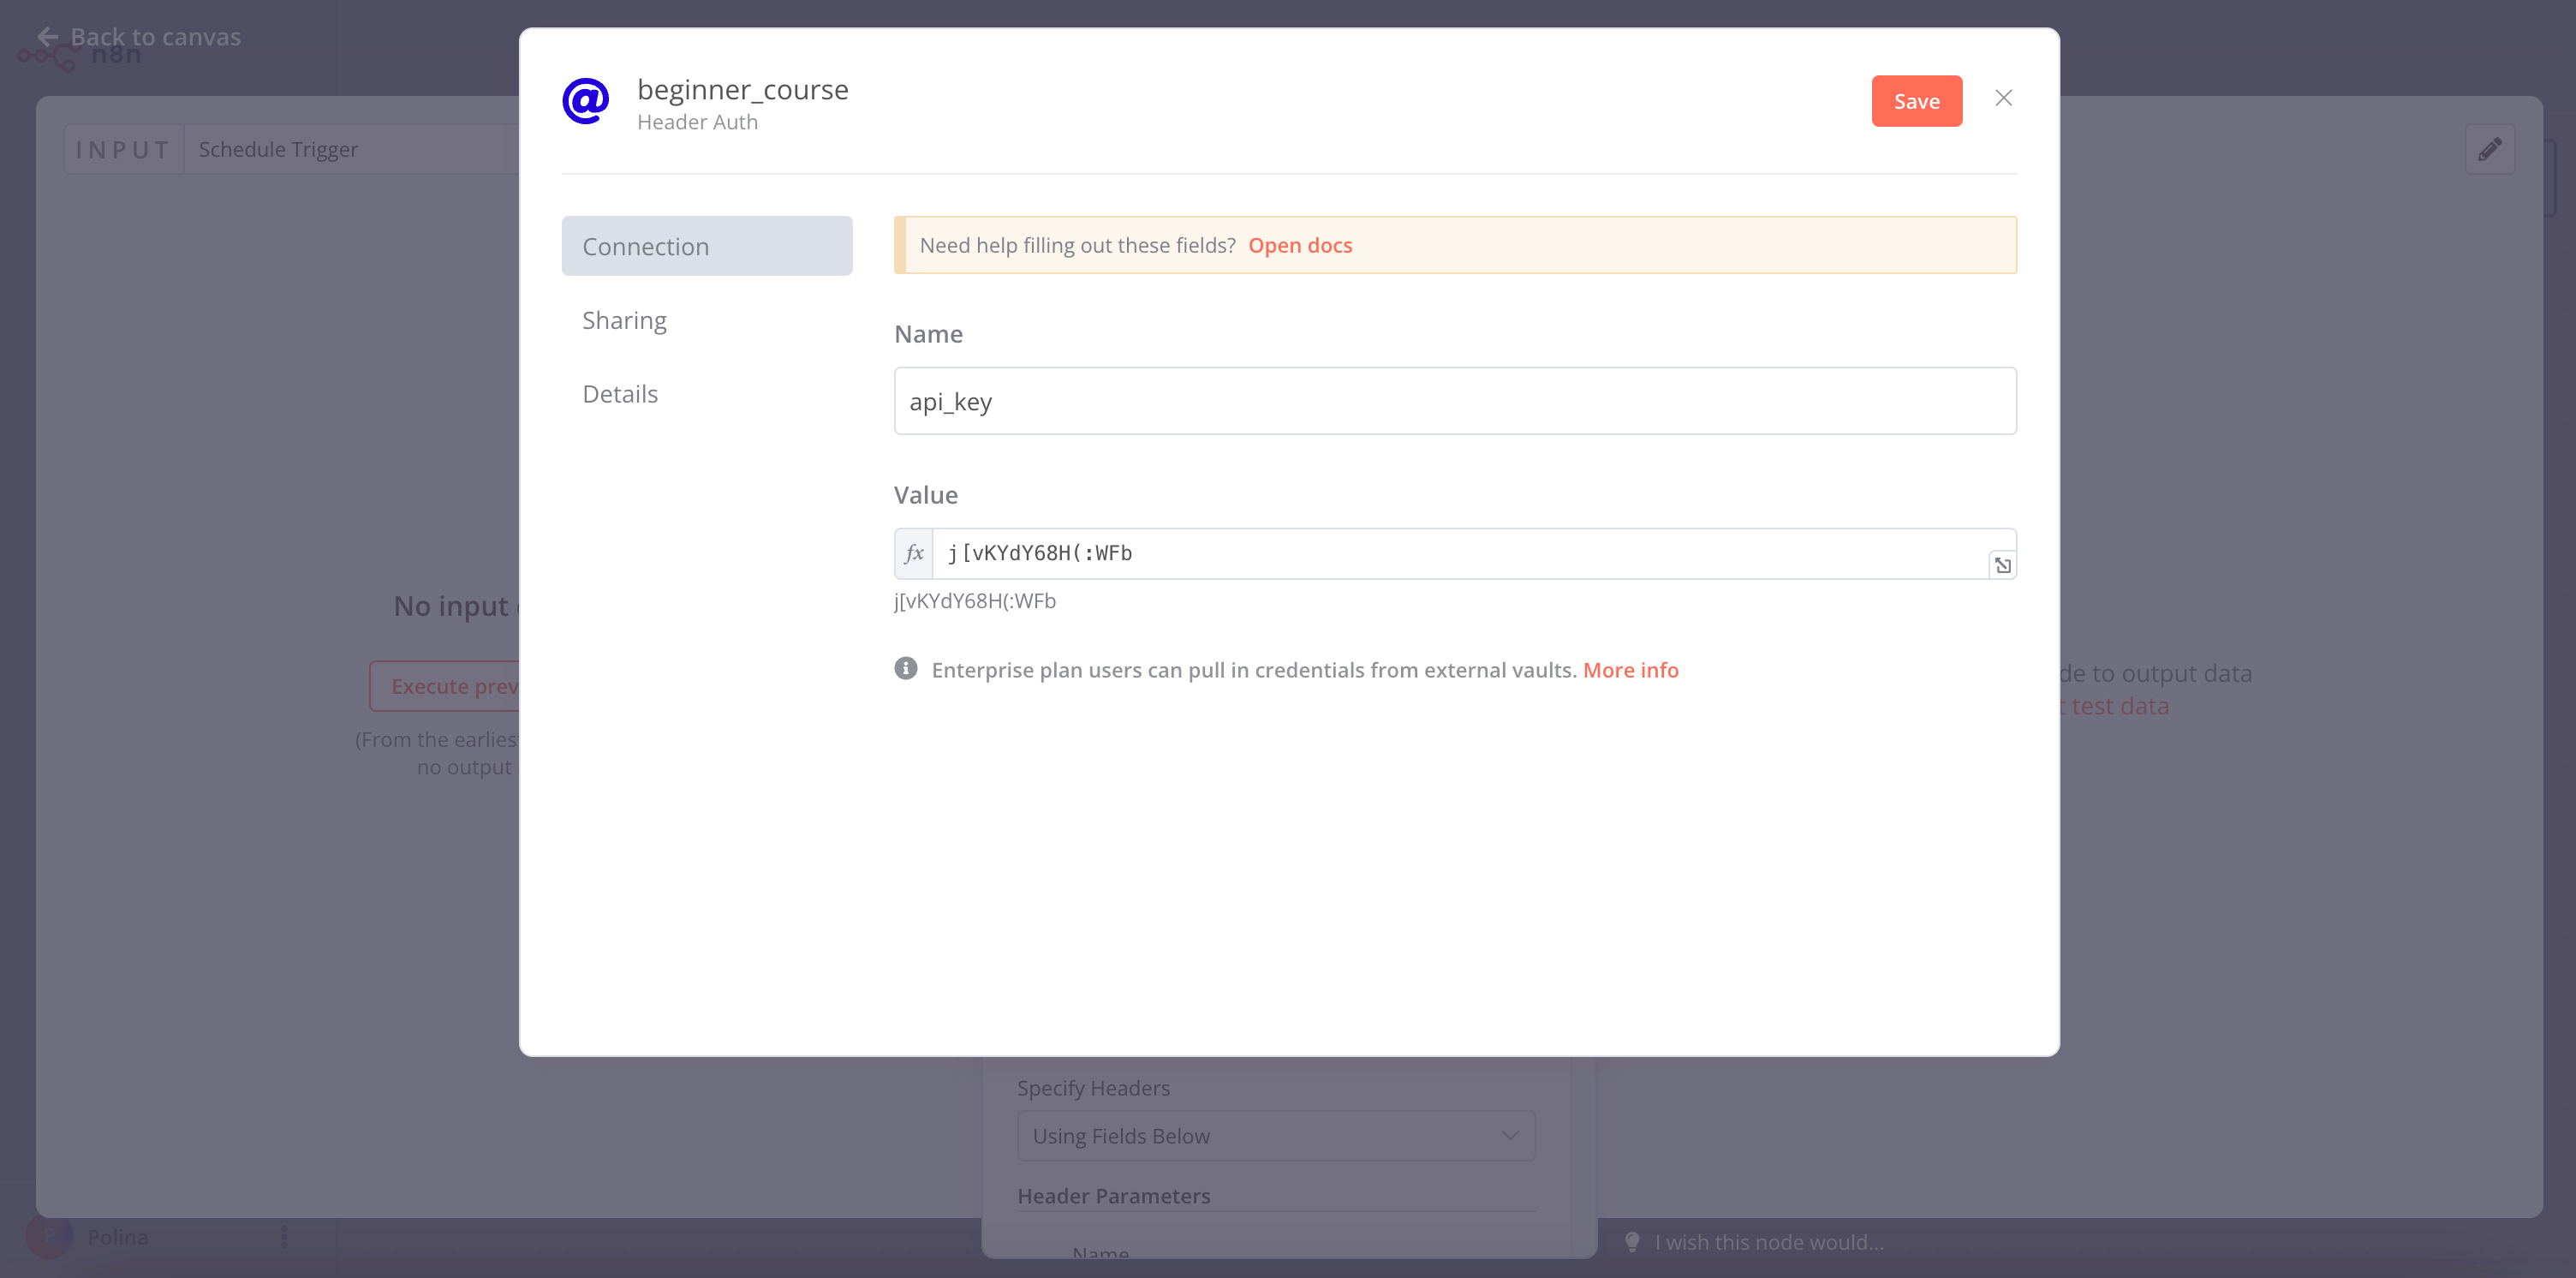
HTTP Request node credentials
Credentials naming
默认情况下,新的凭据名称遵循 "<节点名称> 账户" 格式。你可以点击名称来重命名凭据,操作方式与重命名节点类似。最佳实践是为凭据命名,以便识别应用/服务、类型和用途。命名约定有助于你更轻松地跟踪和识别凭据。
¥New credential names follow the "
保存后,退出“凭据”窗口返回“HTTP 请求”节点。
¥Once you save, exit out of the Credentials window to return to the HTTP Request node.
获取数据#
¥Get the data
在“HTTP 请求”节点窗口中选择“执行步骤”按钮。HTTP 请求结果的表格视图应如下所示:
¥Select the Execute step button in the HTTP Request node window. The table view of the HTTP request results should look like this:

你应该在 构建迷你工作流 页面中见过此视图。
¥This view should be familiar to you from the Building a mini-workflow page.
这是 Nathan 需要处理的来自 ABCorp 数据仓库的数据。此数据集包含 30 位客户的销售信息,共五列:
¥This is the data from ABCorp's data warehouse that Nathan needs to work with. This data set includes sales information from 30 customers with five columns:
orderID:每个订单的唯一 ID。
¥orderID: The unique id of each order.
customerID:每个客户的唯一 ID。
¥customerID: The unique id of each customer.
employeeName:Nathan 负责该客户的同事的名称。
¥employeeName: The name of Nathan's colleague responsible for the customer.
orderPrice:客户订单的总价。
¥orderPrice: The total price of the customer's order.
orderStatus:客户的订单状态是booked还是processing。
¥orderStatus: Whether the customer's order status is booked or still in processing.
下一步是什么?#
¥What's next?
Nathan 🙋:这很棒!你仅用一个节点就自动化了我工作中重要的一部分。现在,我无需每次都手动访问数据,可以使用 HTTP 请求节点自动获取信息。
¥Nathan 🙋: This is great! You already automated an important part of my job with only one node. Now instead of manually accessing the data every time I need it, I can use the HTTP Request Node to automatically get the information.
你 👩🔧:精确!下一步,我将帮助你更进一步,将检索到的数据插入到 Airtable 中。
¥You 👩🔧: Exactly! In the next step, I'll help you one step further and insert the data you retrieved into Airtable.