构建一个迷你工作流#
在本课中,你将构建一个小型的工作流,从 Hacker News 获取 10 篇关于自动化的文章。该过程包含五个步骤:
🌐 In this lesson, you will build a small workflow that gets 10 articles about automation from Hacker News. The process consists of five steps:
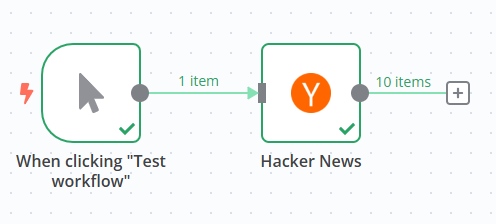
完成的工作流程将如下所示:
🌐 The finished workflow will look like this:
Workflow preview placeholder.
1. 添加一个手动触发节点(1. Add a Manual Trigger node)#
打开节点面板(提示:你可以通过在 画布 右上角选择 + 图标或按键盘上的 N 来打开它)。
🌐 Open the nodes panel (reminder: you can open this by selecting the + icon in the top right corner of the canvas or pressing N on your keyboard).
然后:
🌐 Then:
- 搜索 手动触发 节点。
- 在搜索结果中出现时点击。
这将把 手动触发器 节点添加到你的画布中,允许你通过选择 执行工作流 按钮随时运行工作流。
🌐 This will add the Manual Trigger node to your canvas, which allows you to run the workflow at any time by selecting the Execute workflow button.
2. 添加 Hacker News 节点(2. Add the Hacker News node)#
点击手动触发节点右侧的 + 图标以打开节点面板。
🌐 Select the + icon to the right of the Manual Trigger node to open the nodes panel.
然后:
🌐 Then:
- 搜索 Hacker News 节点。
- 在搜索结果中出现时点击。
- 在 操作 部分,选择 获取多项。
n8n 向画布添加节点,并打开节点窗口以显示其配置详细信息。
🌐 n8n adds the node to your canvas and the node window opens to display its configuration details.
3. 配置 Hacker News 节点(3. Configure the Hacker News node)#
当你向编辑器界面添加一个新节点时,该节点会自动被激活。节点详细信息将会在一个窗口中打开,并提供多个选项:
🌐 When you add a new node to the Editor UI, the node is automatically activated. The node details will open in a window with several options:
- 参数:调整参数以优化和控制节点的功能。
- 设置:调整设置以控制节点的设计和执行。
- 文档:在新窗口中打开此节点的 n8n 文档。
参数 vs. 设置
- 参数 根据每个节点的功能而不同。
- 设置 对所有节点都是相同的。
参数(Parameters)#
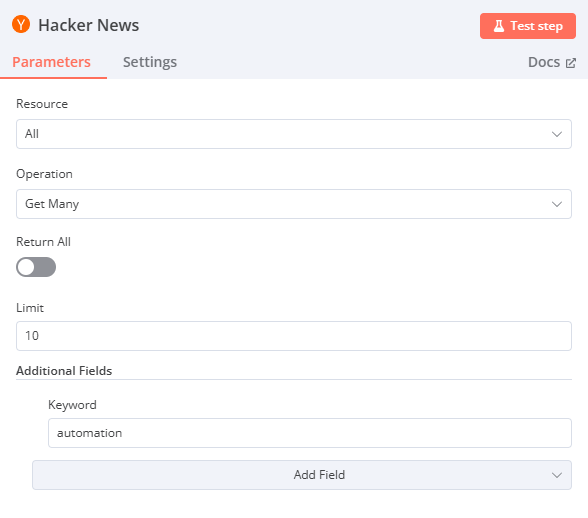
我们需要为 Hacker News 节点配置几个参数才能使其正常工作:
🌐 We need to configure several parameters for the Hacker News node to make it work:
- 资源:全部
该资源选择所有数据记录(文章)。 - 操作: 获取多个
此操作会获取所有选定的文章。 - 限制: 10
此参数设置“获取多个”操作返回结果的数量上限。 - 附加字段 > 添加字段 > 关键字:automation
附加字段 是可以添加到某些节点的选项,用于使你的请求更具体或过滤结果。在这个示例中,我们只想获取包含关键字 “automation” 的文章。
Hacker News 节点的参数配置现在应如下所示:
🌐 The configuration of the parameters for the Hacker News node should now look like this:
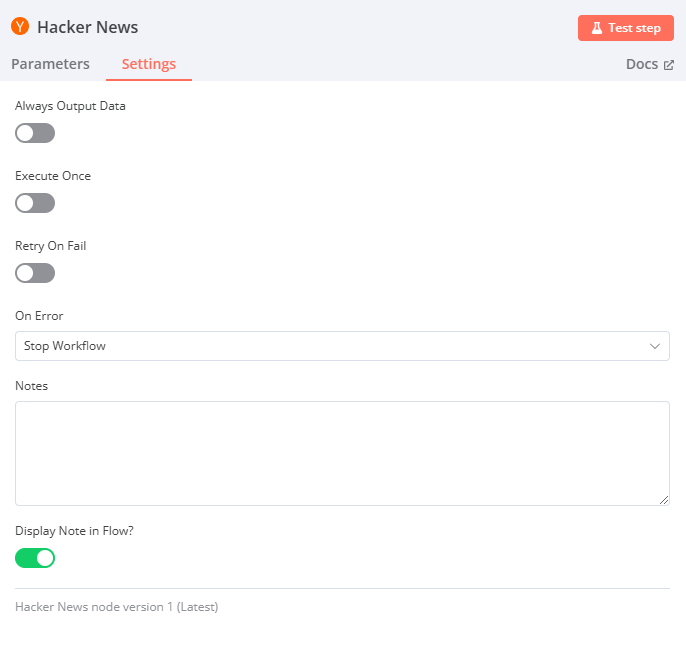
设置(Settings)#
设置部分包括多个节点设计和执行的选项。在本例中,我们只配置最后两个设置,这些设置用于在编辑器 UI 画布中设置节点的外观。
🌐 The Settings section includes several options for node design and executions. In this case, we'll configure only the final two settings, which set the node's appearance in the Editor UI canvas.
在“Hacker News”节点的“设置”中,进行编辑:
🌐 In the Hacker News node Settings, edit:
-
注意:获取最新的10篇文章。
节点注意
在节点中添加简短的说明关于它的功能通常很有帮助。对于复杂或共享的工作流尤其有用!
-
在流程中显示备注?: 切换为 true
此选项将在画布中的节点下显示备注。
Hacker News 节点的设置配置现在应如下所示:
🌐 The configuration of the settings for the Hacker News node should now look like this:
重命名节点
你可以为节点重命名一个更适合你使用场景的名称。有三种方法可以做到这一点:
- 选择你想要重命名的节点,同时按下键盘上的 F2 键。
- 双击节点以打开节点窗口。点击窗口左上角的节点名称,按照你的意愿重命名,然后点击 重命名 以保存新的节点名称。
- 右键点击节点并选择 重命名 选项。

要查找原始节点名称(节点类型),请打开节点窗口并选择 设置。页面底部包含节点类型和版本信息。
4. 执行节点(4. Execute the node)#
在节点详细信息窗口中选择 执行步骤 按钮。你应该能在输出 表格 视图中看到 10 个结果。
🌐 Select the Execute step button in the node details window. You should see 10 results in the Output Table view.
节点执行(Node executions)#
节点执行
节点执行表示该节点的一次运行,用于检索或处理指定的数据。
如果节点执行成功,画布中该节点的顶部会出现一个绿色的小对勾。
🌐 If a node executes successfully, a small green checkmark appears on top of the node in the canvas
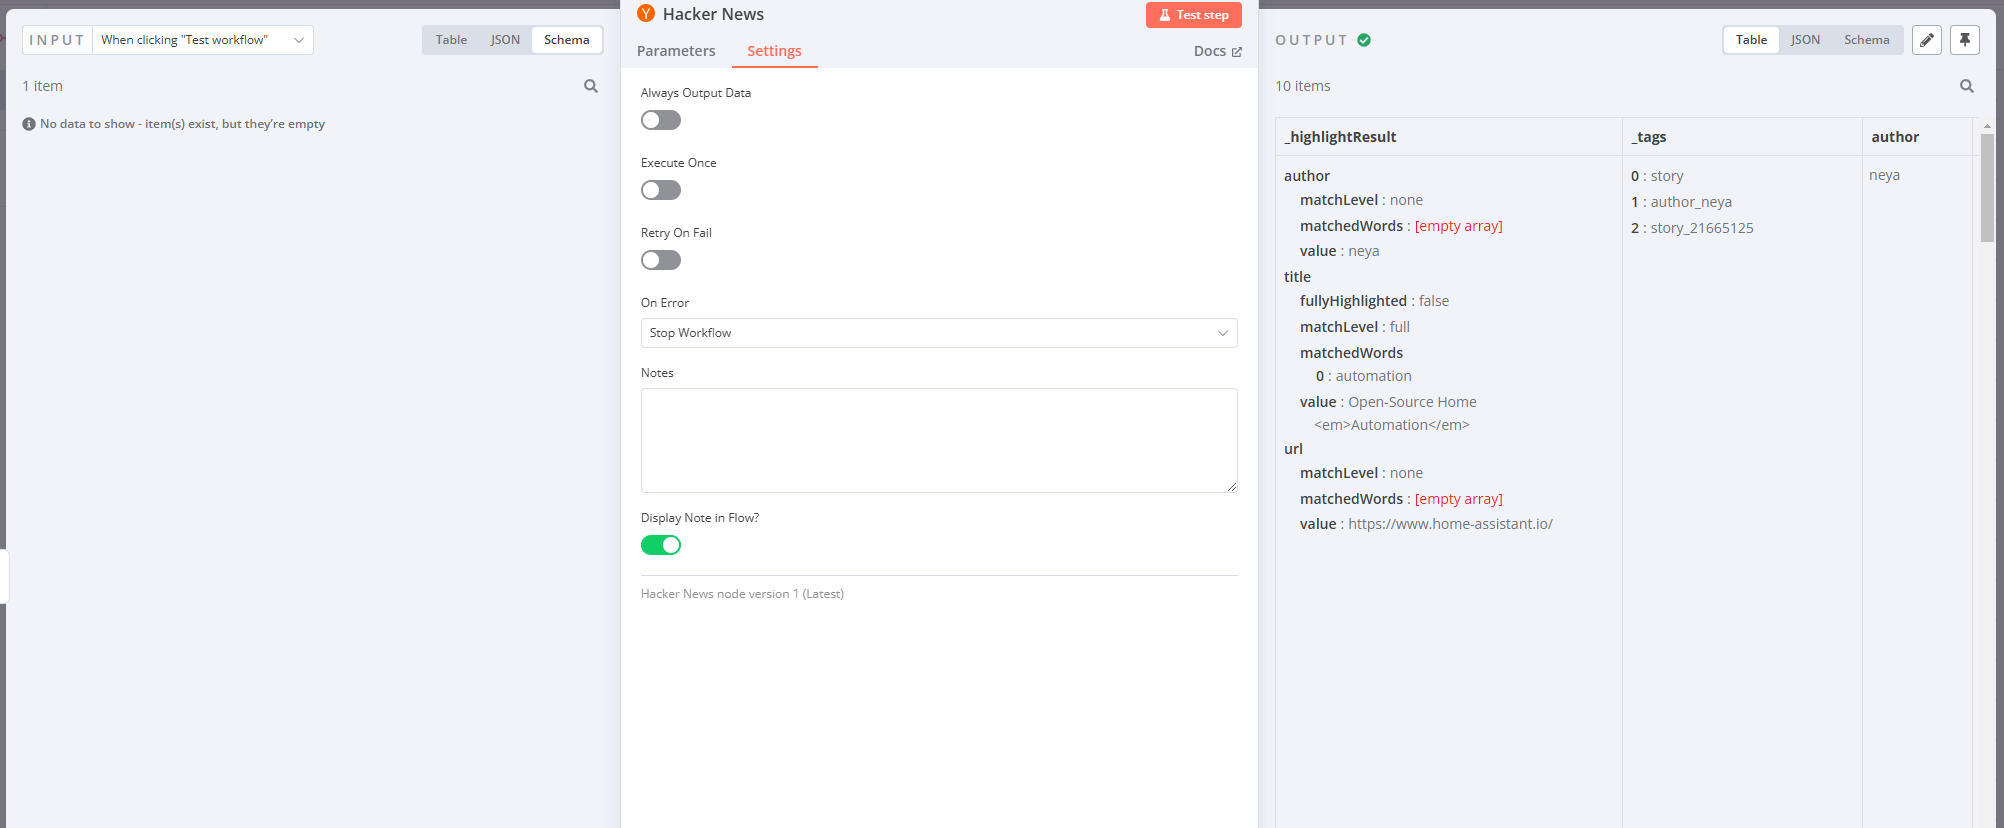
如果参数没有问题且一切正常,请求的数据将以 表格、JSON 和 模式 格式显示在节点窗口中。你可以通过在节点窗口顶部的 Table | JSON | Schema 按钮中选择所需的视图来切换这些视图。
🌐 If there are no problems with the parameters and everything works fine, the requested data displays in the node window in Table, JSON, and Schema format. You can switch between these views by selecting the one you want from the Table | JSON | Schema button at the top of the node window.
表格视图与 JSON 视图
表格视图是默认视图。它以表格形式显示所请求的数据,其中行表示记录,列表示这些记录的可用属性。
以下是 Hacker News 的 JSON 输出:
🌐 Here's our Hacker News output in JSON view:
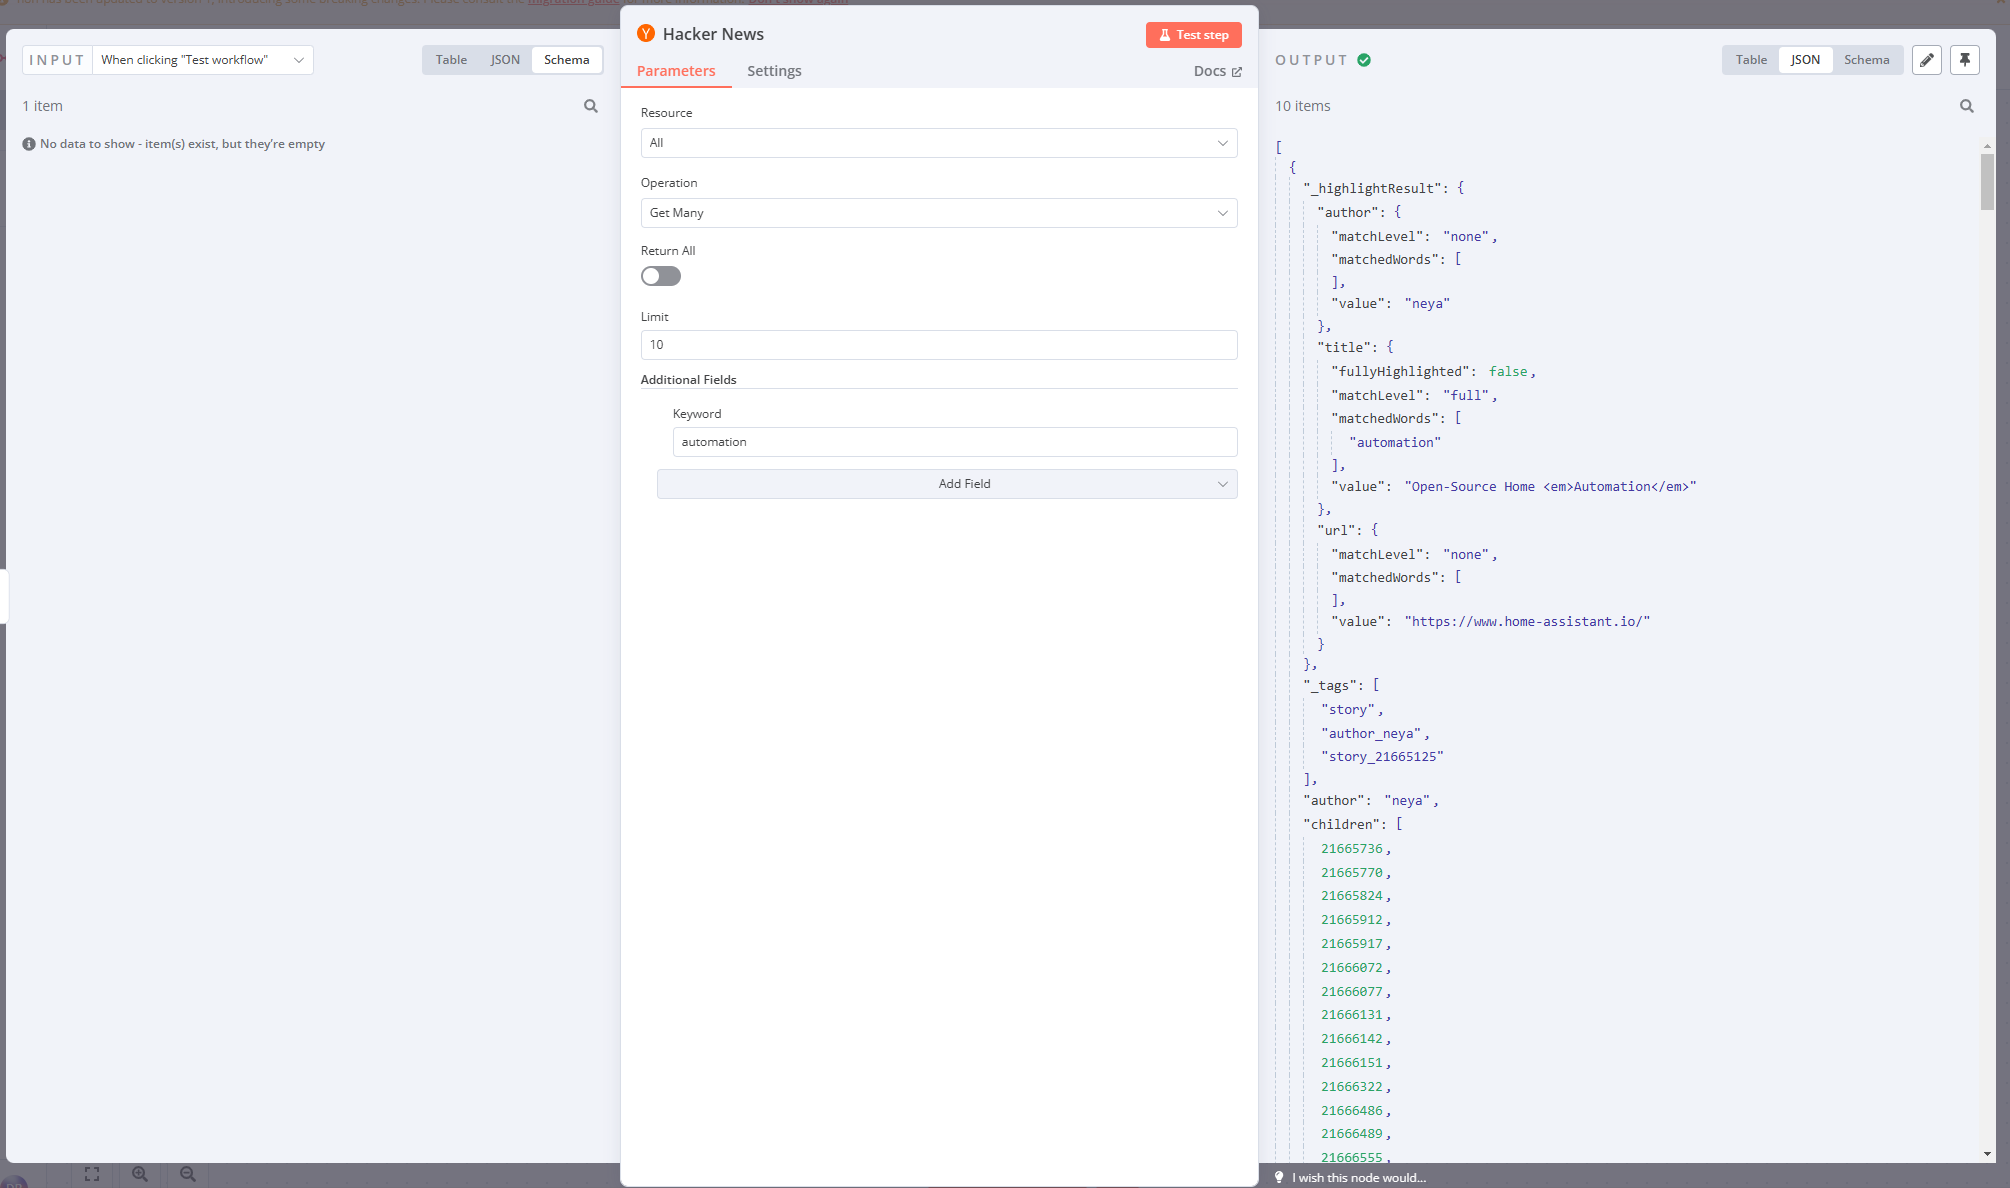
节点窗口将显示有关节点执行的更多信息:
🌐 The node window displays more information about the node execution:
- 在 输出 标题旁边,注意一个小图标(如果节点执行成功,这将是一个绿色对勾)。在它旁边,有一个信息图标。如果将鼠标悬停在其上,你将获得两条额外信息,这些信息可以提供有关工作流中每个节点性能的见解:
- 开始时间:节点执行开始的时间。
- 执行时间:从节点开始执行到返回结果所花费的时间。
- 就在 输出 标题下方,你会注意到另一条信息:10 项。此字段显示节点请求返回的项目(记录)数量。在这个示例中,预期为 10,因为这是我们在第 2 步中设置的限制。但如果你没有设置限制,看到实际返回了多少记录会很有用。
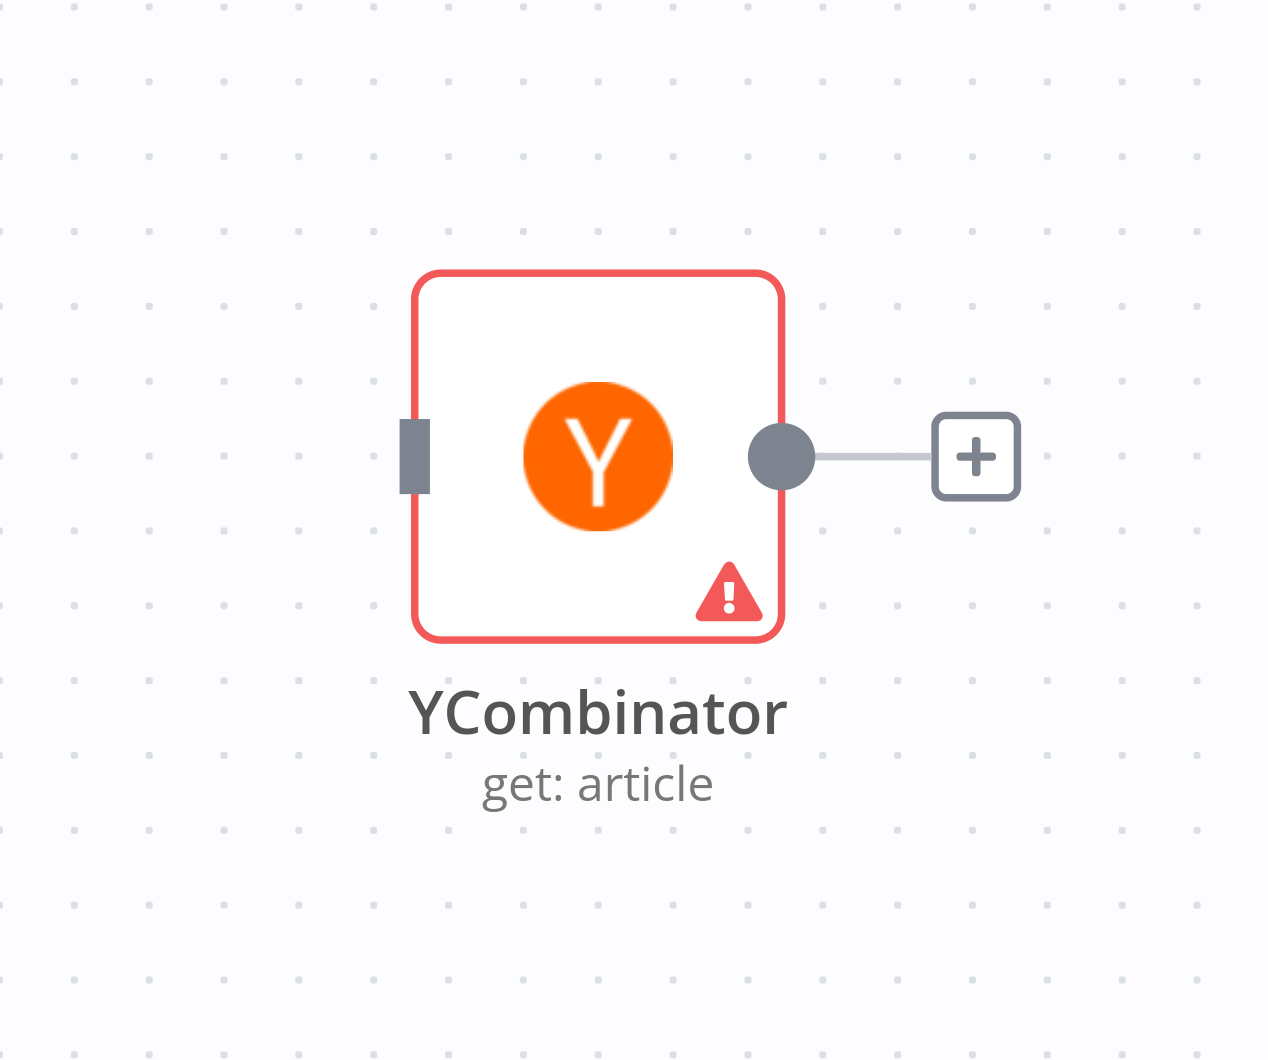
Error in nodes
A red warning icon on a node means that the node has errors. This might happen if the node credentials are missing or incorrect or the node parameters aren't configured correctly.
5. 保存工作流(5. Save the workflow)#
编辑完节点后,选择 返回画布 回到主画布。
🌐 Once you're finished editing the node, select Back to canvas to return to the main canvas.
默认情况下,你的工作流会自动保存为“我的工作流”。
🌐 By default, your workflow is automatically saved as "My workflow."
在本课中,将工作流程重命名为“黑客新闻工作流程”。
🌐 For this lesson, rename the workflow to be "Hacker News workflow."
提醒
你可以通过点击编辑器界面顶部的工作流名称来重命名工作流。
重命名工作流后,请务必保存。
🌐 Once you've renamed the workflow, be sure to save it.
你可以通过两种方式保存工作流:
🌐 There are two ways in which you can save a workflow:
- 在编辑器界面的画布上,按下键盘上的 Ctrl + S 或 Cmd + S。
- 在编辑器界面右上角选择 保存 按钮。你可能需要先通过点击对话框外部来离开节点编辑器。
如果你看到灰色的 已保存 文字而不是 保存 按钮,说明你的工作流程已自动保存。
🌐 If you see a grey Saved text instead of the Save button, your workflow was automatically saved.
摘要(Summary)#
恭喜你,你刚刚建立了你的第一个工作流!在本课中,你学习了如何在应用节点中使用动作,配置它们的参数和设置,以及保存和执行你的工作流。
🌐 Congratulations, you just built your first workflow! In this lesson, you learned how to use actions in app nodes, configure their parameters and settings, and save and execute your workflow.
在下一节课中,你将见到你的新客户内森,他需要自动化他的销售报告工作。你将为他的使用场景构建一个更复杂的工作流程,帮助他在工作中提高效率。
🌐 In the next lesson, you'll meet your new client, Nathan, who needs to automate his sales reporting work. You will build a more complex workflow for his use case, helping him become more productive at work.